Location creation
How to create a new location?
The locations' creation is available in the web-based App only.
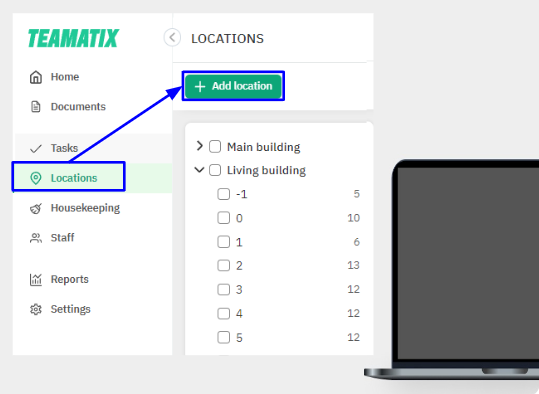
1. Click the Add location button in the Location menu section

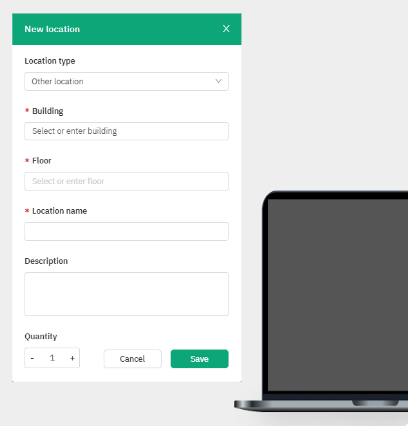
2. Fill in the fields

- Location type* : Room/Other location. Choose from the drop-down list. Rooms are the objects from your PMS (room/house/apartment, etc.) Other locations are the common guest areas, back office, conference rooms, food outlets, etc.
The Room type* field appears additionally when selecting a Room location type. Select a room type from the drop-down list. Rooms are automatically created in Teamatix when integrating with PMS. If rooms were previously created in Teamatix with location names matching PMS names, they will be overwritten and integrated without duplicating.
- Building* - select from the drop-down list.
- Floor* - select from the drop-down list. To create an additional building/floor, enter its name/number in the corresponding field and continue filling in the rest fields in the New location window. A new building/floor is created automatically after the location is saved.
- Location name* - type the name/number. We recommend choosing the name for rooms following the PMS room names.
- Description - type any additional data about the location.
- Quantity - specify the number of new locations with the same name to be created.
In some cases, it may be more convenient to create several locations with the same name at once and then rename/change the building/floor using the Edit function. Changing the Location type in the Edit mode is unavailable.

(*) required fields
3. Click the Save button
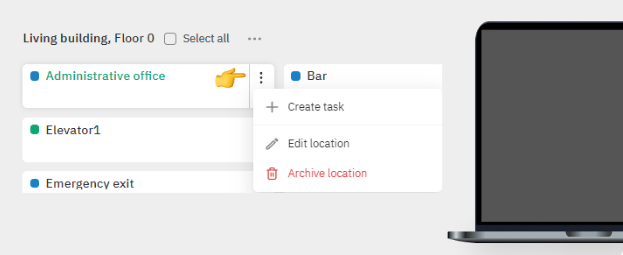
Previously created and used locations cannot be deleted or merged. They can only be archived. A new task creation is available from the Location shortcut menu. For such tasks, the Location will be prefilled.
The reservation statuses and room cleaning statuses will be updated automatically when integrated with PMS. This data will not be uploaded to the application when rooms are created manually.